Hi, how can we help you?
Use Knowledge Base search below or find answers in
Obtain benefits by monetizing your own multimedia content.
Justforfans.app is our easy to use editable website specially designed for creators to publish and customize their own media content and make them feel at home. It is a digital platform with its own domain https://justforfans.app, which can be adapted to the needs of customers and can also be integrated into all social media platforms.
Content and features
We provide creator users with the possibility of publishing their multimedia content, always in compliance with the terms of use of the site and their privacy. The part of explicit content is limited and only for people over 18 years of age. The contents can only be original content of the creator. In case of violations of the rules, they would lead to the immediate cancellation of the user, followed by measures and actions by our legal offices.
Support and helpdesk Justforfans.app
Our team has established a dedicated technical group to offer expert guidance on platform usage. Additionally, we are in the process of creating a comprehensive FAQ section to facilitate instant problem-solving for any issues encountered on the platform. Our users benefit from a blend of technical information accessible through both IG @justforfans.app and by mail to justforfansapp@gmail.com, ensuring they have all the necessary support for a seamless experience.
Payments on the platform
Payment options on the platform are diverse, catering to both traditional and modern financial preferences. For credit card transactions, we utilize CCBILL, a reliable and secure payment processor. Additionally, we embrace the evolving world of digital currency by integrating decentralized cryptocurrency platforms. This includes services like CoinPayment, NowPayments, and Qvapay, all of which facilitate seamless cryptocurrency transactions, offering our users the flexibility to make payments using various digital currencies.
On March 21, 2024, we launched an update enabling cryptocurrency payments, enhancing transaction flexibility and security for our users.
On March 21, 2024, we launched an update enabling cryptocurrency payments, enhancing transaction flexibility and security for our users.
Identity Verification: A Crucial Step for Your Safety and Success on JustForFans.app
Welcome to JustForFans.app, the platform where your creativity meets its audience! To ensure safety and trust within our community, it's essential for every creator to complete an identity verification process. Why is this so important?
Thank you for joining us and for your commitment to a safe and authentic community!
- Trust and Credibility: By verifying your identity, you show your followers and the community that you are a real, trustworthy person. This not only enhances security on the platform but also strengthens your relationship with your audience.
- Legal Compliance: To adhere to current laws and regulations, we need to confirm that all our creators are of legal age. This step is crucial to maintain the legality and integrity of JustForFans.app.
- Personal Protection: Your safety is our top priority. By verifying your identity, we ensure that only authorized and responsible individuals have access to create content on the platform.
Thank you for joining us and for your commitment to a safe and authentic community!
How do withdrawals work on Just For Fans?
Withdrawal Process: Withdrawals on Just For Fans are processed within a 7-business-day timeframe following the withdrawal request. This period is necessary to verify all transactions and profiles, ensuring security and accuracy in the process.
Potential Delays: Occasionally, there might be delays in processing withdrawals. This is primarily due to the need for detailed verification of transactions and user profiles, ensuring security and compliance with regulations.
Taxes and Fees: Withdrawals are subject to a tax fee of 9.9%, managed by CCBILL, the platform responsible for credit card payments. In addition, European citizens are subject to VAT withholding, which in this case is 22%.
Fiscal Documentation for European Creators: It is crucial that content creators located in Europe submit the necessary fiscal documentation in accordance with the new regulations. This documentation is essential for the proper processing of withdrawals and for meeting relevant fiscal obligations.
We hope this information helps you better understand the withdrawal process on Just For Fans. If you have more questions or need further assistance, please don't hesitate to contact us.
Tips about perfil configuration in Just For fans
Here are some tips on setting up your creator profile on JFF:
Under the "Edit my page" section, creator users can configure their profile.
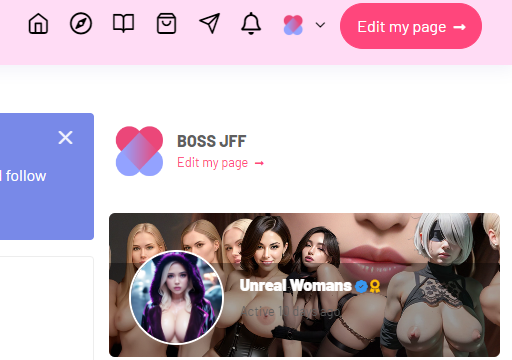
1 - The "Full Name" field will appear on your profile. This field is editable.
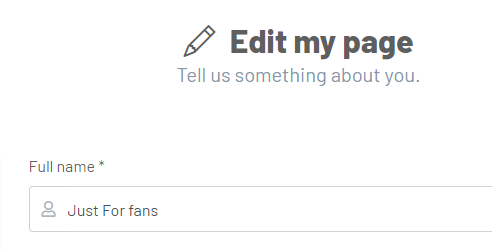
2 - "Username" is mandatory to choose and change since the platform considers this field when publishing and promoting profiles that meet these requirements.
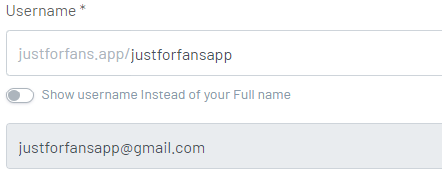
3 - The same goes for the "email" and the "Tell us about your story" field, which is a presentation or summary about yourself in 250 characters.

4 - The other fields are optional, but keep in mind that promoting yourself on different platforms can be a way to expand.
The graphics of your page:
5 - On "My Page", you can change the "cover" and the "avatar," which is the image of your profile. Avatar: Recommended image size 250x250 px. Cover: Recommended image size 1500x800 px.
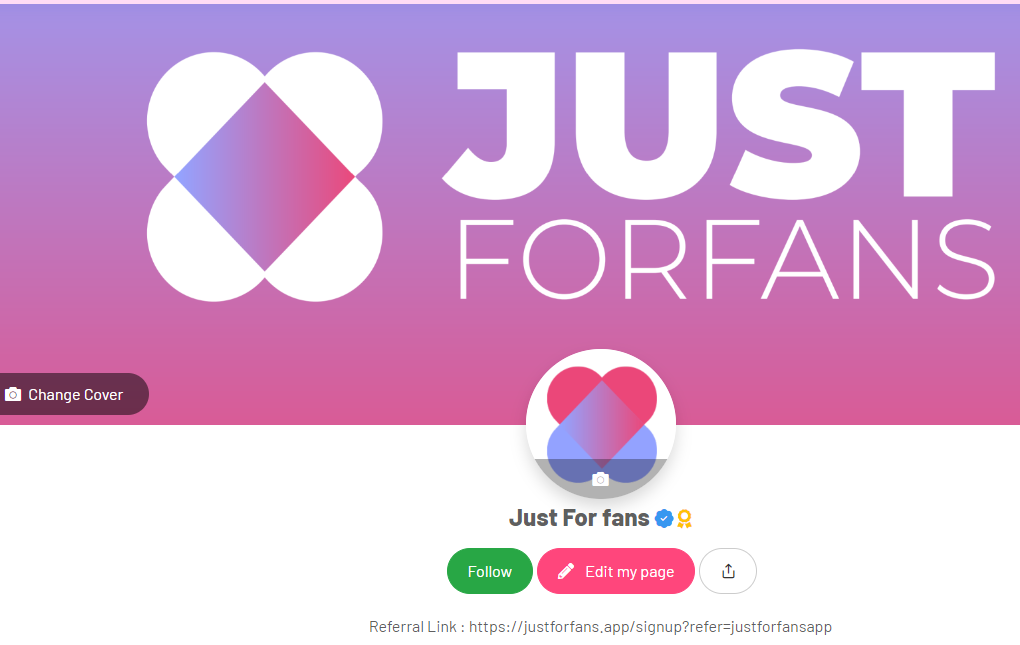
6 - The referral link is generated automatically and ready to share. All users have the possibility to earn passive income through the platform with the referral plan, with a 3% benefit on all operations of your referrals. Payments are made in cryptocurrencies, and the benefiting users must first verify their tax information, this is a mandatory European KYC regulation.
7 - Photo formats allowed are "JPG, JPEG, PNG", and video "MP4, MOV" with a maximum of 256MB. The characters for commenting on your posts are 250.
Under the "Edit my page" section, creator users can configure their profile.

1 - The "Full Name" field will appear on your profile. This field is editable.

2 - "Username" is mandatory to choose and change since the platform considers this field when publishing and promoting profiles that meet these requirements.

3 - The same goes for the "email" and the "Tell us about your story" field, which is a presentation or summary about yourself in 250 characters.

4 - The other fields are optional, but keep in mind that promoting yourself on different platforms can be a way to expand.
The graphics of your page:
5 - On "My Page", you can change the "cover" and the "avatar," which is the image of your profile. Avatar: Recommended image size 250x250 px. Cover: Recommended image size 1500x800 px.

6 - The referral link is generated automatically and ready to share. All users have the possibility to earn passive income through the platform with the referral plan, with a 3% benefit on all operations of your referrals. Payments are made in cryptocurrencies, and the benefiting users must first verify their tax information, this is a mandatory European KYC regulation.
7 - Photo formats allowed are "JPG, JPEG, PNG", and video "MP4, MOV" with a maximum of 256MB. The characters for commenting on your posts are 250.
Forgot Password
Forgetting your password can be frustrating, but recovering access to your account is straightforward and secure. Here's a step-by-step guide to help you reset your password and regain control of your account swiftly.
Step 1: Identify Your Account Navigate to the login page of the platform. Below the password entry field, you'll find a link that says, "Forgot Password?" Click on this link to initiate the password recovery process. This step is crucial as it tells the system that you need to reset your password.
Step 2: Enter Your Registered Email You'll be prompted to enter the email address associated with your account. This is an essential step because the password reset link will be sent to this email address. Make sure to enter your email correctly to receive the necessary instructions for resetting your password.
Step 3: Check Your Inbox After submitting your email address, check your inbox for an email from the platform. This email will contain a password reset link. If you don't see the email immediately, check your spam or junk folder as it may have been mistakenly filtered.
Step 4: Follow the Reset Link Click on the password reset link in the email. This link will take you to a secure page where you can create a new password. Choose a strong, unique password that you haven't used before to ensure the security of your account.
Step 5: Log In With Your New Password Once you've set your new password, you can log in to your account using your email and the new password. This completes the password recovery process, and you should now have full access to your account again.
If you encounter any issues or need further assistance, please do not hesitate to contact our support team.
Ready to reset your password? Click here: https://justforfans.app/password/reset
By following these steps, you can recover your password quickly and securely, ensuring uninterrupted access to your account.
How to View Your Subscribers with Free Subscriptions
If you're offering free subscriptions and wish to view your subscriber list, follow this simple procedure:
- Activate the Subscriber List Page: Initially, you need to activate the page where your subscribers are listed. This is done by enabling a feature that's typically associated with paid subscriptions.
- Set Up a Monthly Subscription: Temporarily set up a monthly subscription by including a price. Navigate to the subscription settings on your dashboard and enter the required subscription amount in the designated field.
- Save Your Changes: After setting the price, ensure to save your changes. This step is crucial for the activation to take effect.
- Deactivate the Monthly Subscription: Once the subscriber list page is activated, you can proceed to deactivate the monthly subscription. Return to your subscription settings, remove the previously set price, and then save your changes again.
- Access Your Subscriber List: Now that you have activated and then deactivated the monthly subscription setting, you will be able to access your list of subscribers. This information can be found at the following link: https://justforfans.app/my/subscribers.
Cryptocurrency Withdrawals Policy Summary
Cryptocurrency Withdrawals Policy Summary:
Justforfans has strict policies for cryptocurrency withdrawals to comply with regulatory standards and prevent fraud. These include:
Justforfans enforces severe measures against fraudulent activities to maintain platform integrity and protect users, including:
Justforfans has strict policies for cryptocurrency withdrawals to comply with regulatory standards and prevent fraud. These include:
- Exhaustive Verification: To prevent money laundering and credit card theft, rigorous verification processes are in place. This ensures the legality of all transactions.
- Required Documentation for Withdrawal: Users must provide a government-issued ID, a selfie with a written note including "Just For Fans" and the current date, and a recent utility bill as proof of residence.
- Transaction Review: Each withdrawal undergoes a detailed review to ensure transactions are legitimate and not related to fraudulent activities.
- Withdrawal Approval: Withdrawals are only approved after all verifications are complete, which may delay fund reception.
- Right to Refuse Withdrawal: Withdrawals may be refused if required documents are not provided or if transactions are suspected of fraud or violating terms of service.
Justforfans enforces severe measures against fraudulent activities to maintain platform integrity and protect users, including:
- Verification of Transaction Flow: Transaction flows are verified with credit card payment providers to ensure transparency and fraud prevention.
- Cross-Verification for Regularity: Cross-verification methods detect and prevent fraud and money laundering.
- Consequences for Fraudulent Creators: Involved creators will face fund retention for refunds, account termination, and potential legal reporting.
Just For Fans Contest

Attention creators! 🎉 To celebrate JustForFans' 3rd anniversary, we are launching our first content contest with great prizes. 💰 $10,000 USD prizes for the top 10 creators who publish and generate $200k in earnings on our platform. 📅 Deadline: 12/31. Don’t miss this opportunity! 🌟 #ContentContest #Prizes #JustForFans #Anniversary
Contest Rules for Content Creators
- Eligibility:
- The contest is open to all content creators registered on our platform.
- Participants must be at least 18 years old.
- Contest Period:
- The contest begins on June 1 and ends on December 31.
- Only content published during this period will be considered for the contest.
- Selection Criteria:
- The top 10 creators will be selected based on the earnings generated by their content.
- To be eligible, a creator must generate at least $200,000 in earnings through the platform during the contest period.
- Earnings Calculation:
- Earnings will be calculated based on the net income generated by the creator's content, excluding any platform commissions.
- All allowed income sources on the platform will be considered.
- Publication and Content:
- Content must comply with all platform policies and terms of use.
- Any content that infringes copyright, is offensive, or violates community guidelines is prohibited.
- Prizes:
- The top 10 creators with the highest earnings will each receive a $10,000 USD prize.
- Prizes will be awarded within 30 days after the contest ends.
- Disqualification:
- Manipulation of statistics, use of bots, or other fraudulent methods will result in immediate disqualification.
- The platform reserves the right to disqualify any participant who violates the rules or terms of use.
- Announcement of Winners:
- Winners will be announced on January 15.
- Winners will be notified by email and through an announcement on the platform.
- Responsibility and Acceptance of Rules:
- By participating in the contest, creators accept all rules and conditions.
- The platform is not responsible for any loss or damage that may arise from participation in the contest.
- Modifications:
- The platform reserves the right to modify the contest rules at any time, notifying participants of any significant changes.
How to Maintain Active Subscriptions on Our Platform: Compliance Update for Creators
Overview
To enhance user engagement and content quality, our platform now requires all creators to update their profiles with a minimum of four posts per month. This guide will help you understand why this change is essential and how you can comply to maintain active subscriptions.
Why Regular Posting is Required
Regular posting is crucial for maintaining an active and engaging creator profile. By following this guide, you can ensure that your content meets platform standards and your subscriptions remain active. We value your contributions and are excited to see how your consistent engagement helps grow your audience and enhances your presence on our platform.
Need Help?
If you have questions or need assistance with your content strategy, please contact our support team. We're here to help you succeed!
Thank you for being a valued member of our community. We look forward to your continued creativity and engagement.
To enhance user engagement and content quality, our platform now requires all creators to update their profiles with a minimum of four posts per month. This guide will help you understand why this change is essential and how you can comply to maintain active subscriptions.
Why Regular Posting is Required
- Enhanced Engagement: Regular updates keep your audience engaged and eager for your next post, strengthening your connection with followers.
- Dynamic Content: Fresh content attracts more subscribers and potentially increases your earnings by keeping your profile appealing to new and existing subscribers.
- Quality Standards: Our commitment to providing subscribers with a high-quality experience means ensuring all creators contribute actively and consistently.
- What to Expect: Every 30 days, we will review each creator's profile to confirm that at least four new posts have been uploaded within the past month.
- Consequences of Non-Compliance: If a profile does not meet this requirement, the associated subscriptions will be deactivated until the minimum post count is met. This deactivation could impact your subscriber count and earnings.
- Review Your Posting Strategy: Assess your current posting frequency and adjust your content calendar to meet the new requirements.
- Content Planning: Plan your posts in advance. This not only helps in maintaining the required posting frequency but also reduces the stress of last-minute content creation.
- Monitor Your Profile: Regularly check your profile to ensure it aligns with the compliance standards. Utilize platform tools to track your posting activity and subscriber engagement.
- Stay Updated: Keep abreast of any further updates or tips by checking platform notifications and emails. Staying informed helps you adapt to changes more efficiently and take advantage of new features or promotional opportunities.
Regular posting is crucial for maintaining an active and engaging creator profile. By following this guide, you can ensure that your content meets platform standards and your subscriptions remain active. We value your contributions and are excited to see how your consistent engagement helps grow your audience and enhances your presence on our platform.
Need Help?
If you have questions or need assistance with your content strategy, please contact our support team. We're here to help you succeed!
Thank you for being a valued member of our community. We look forward to your continued creativity and engagement.
How to Upload Content on the Platform
To upload content on our platform, follow these steps:
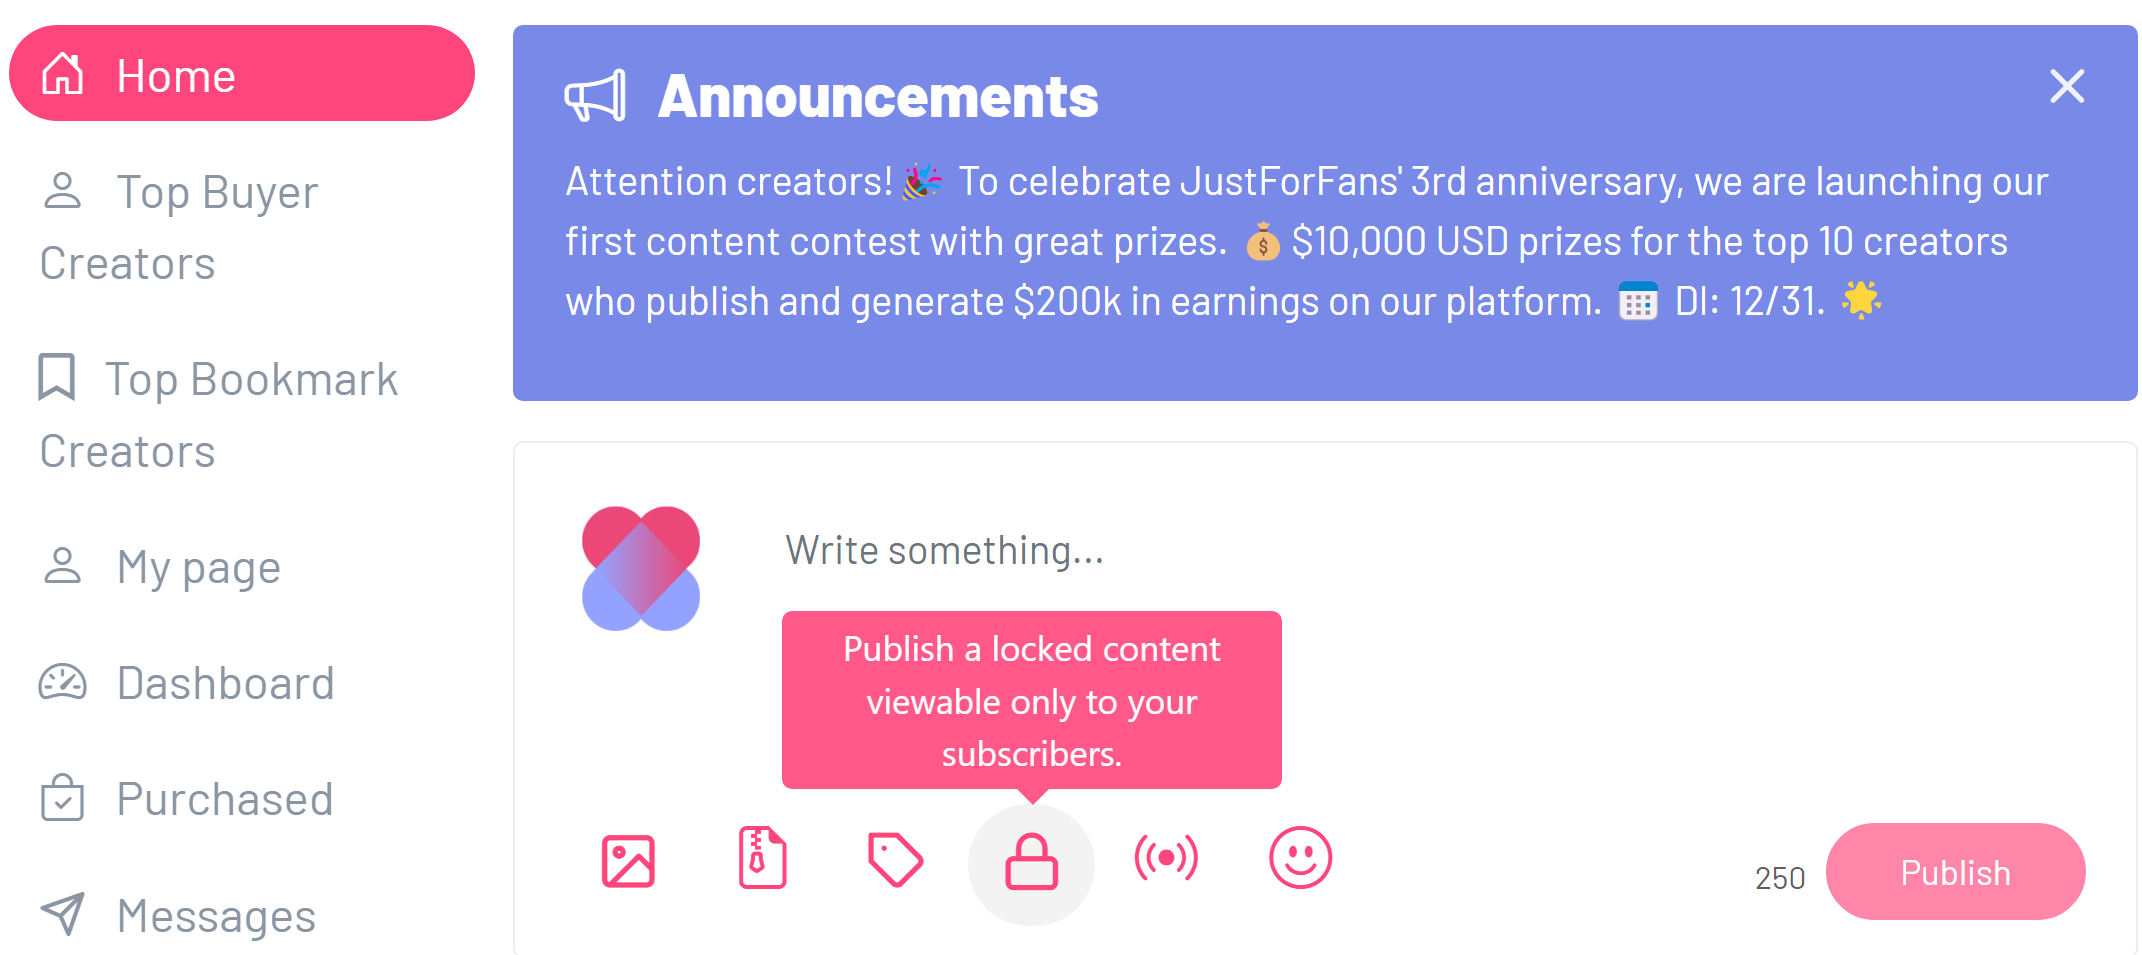
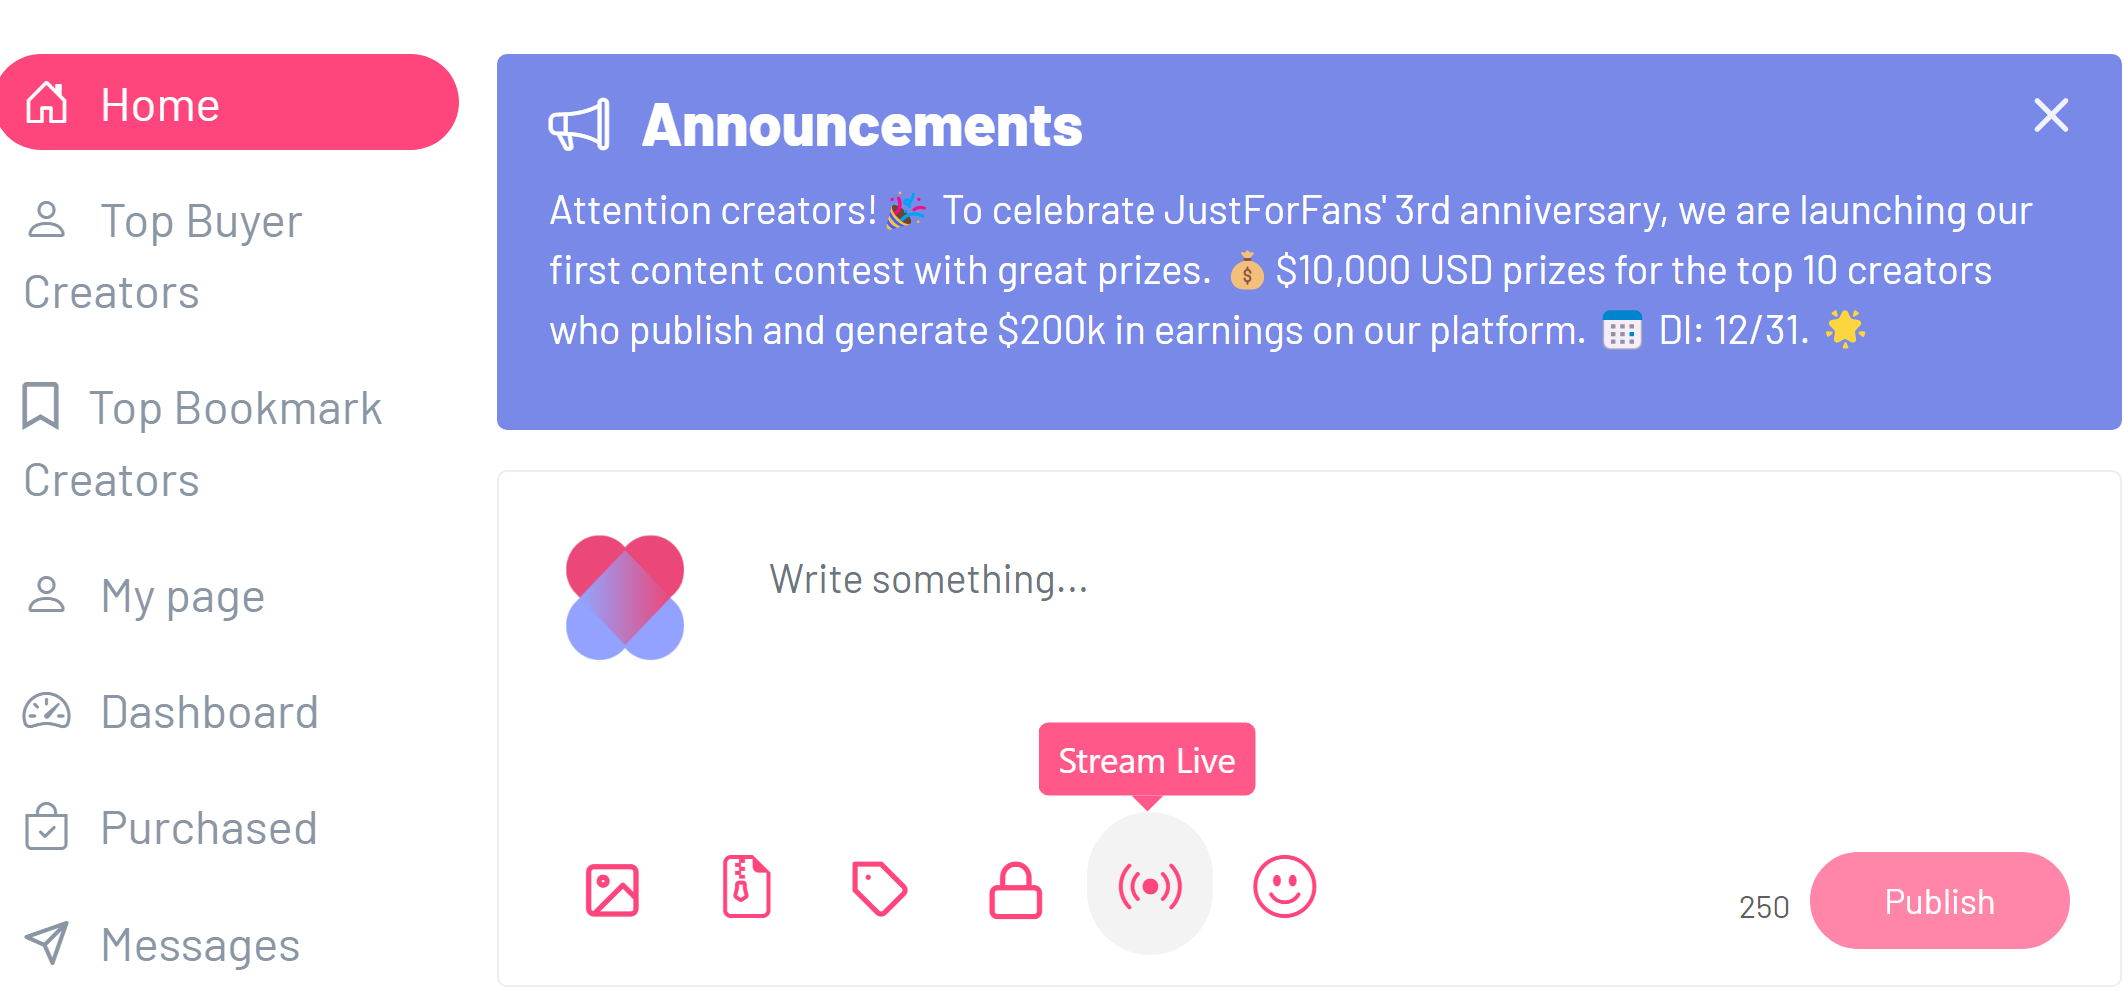
Live streaming: The five button you can make a live stream show post.
- Become a Creator: Before uploading content, you need to become a verified creator. Here’s how:
- Upload a valid photo ID with your date of birth clearly visible.
- Uploading Content: Once verified as a creator, you can start uploading content:
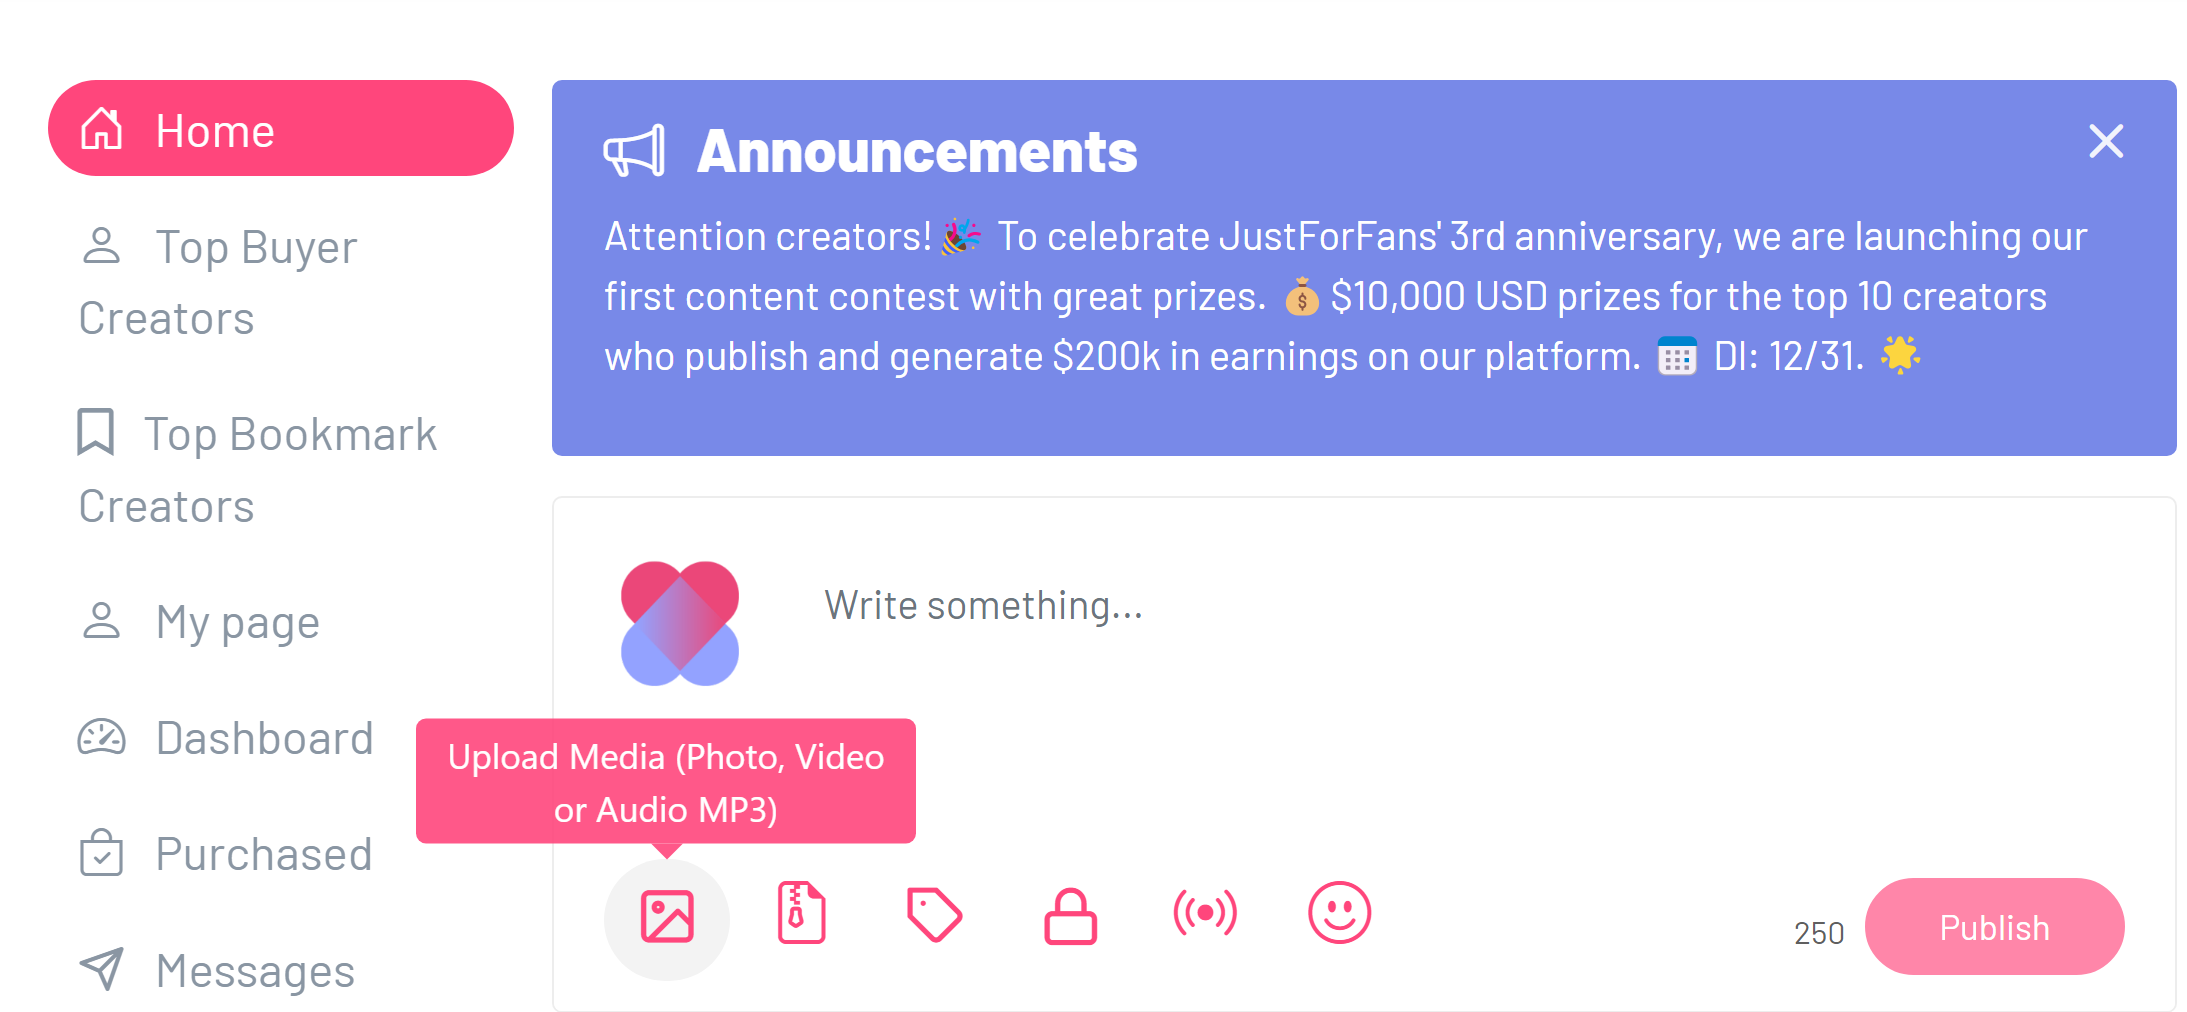
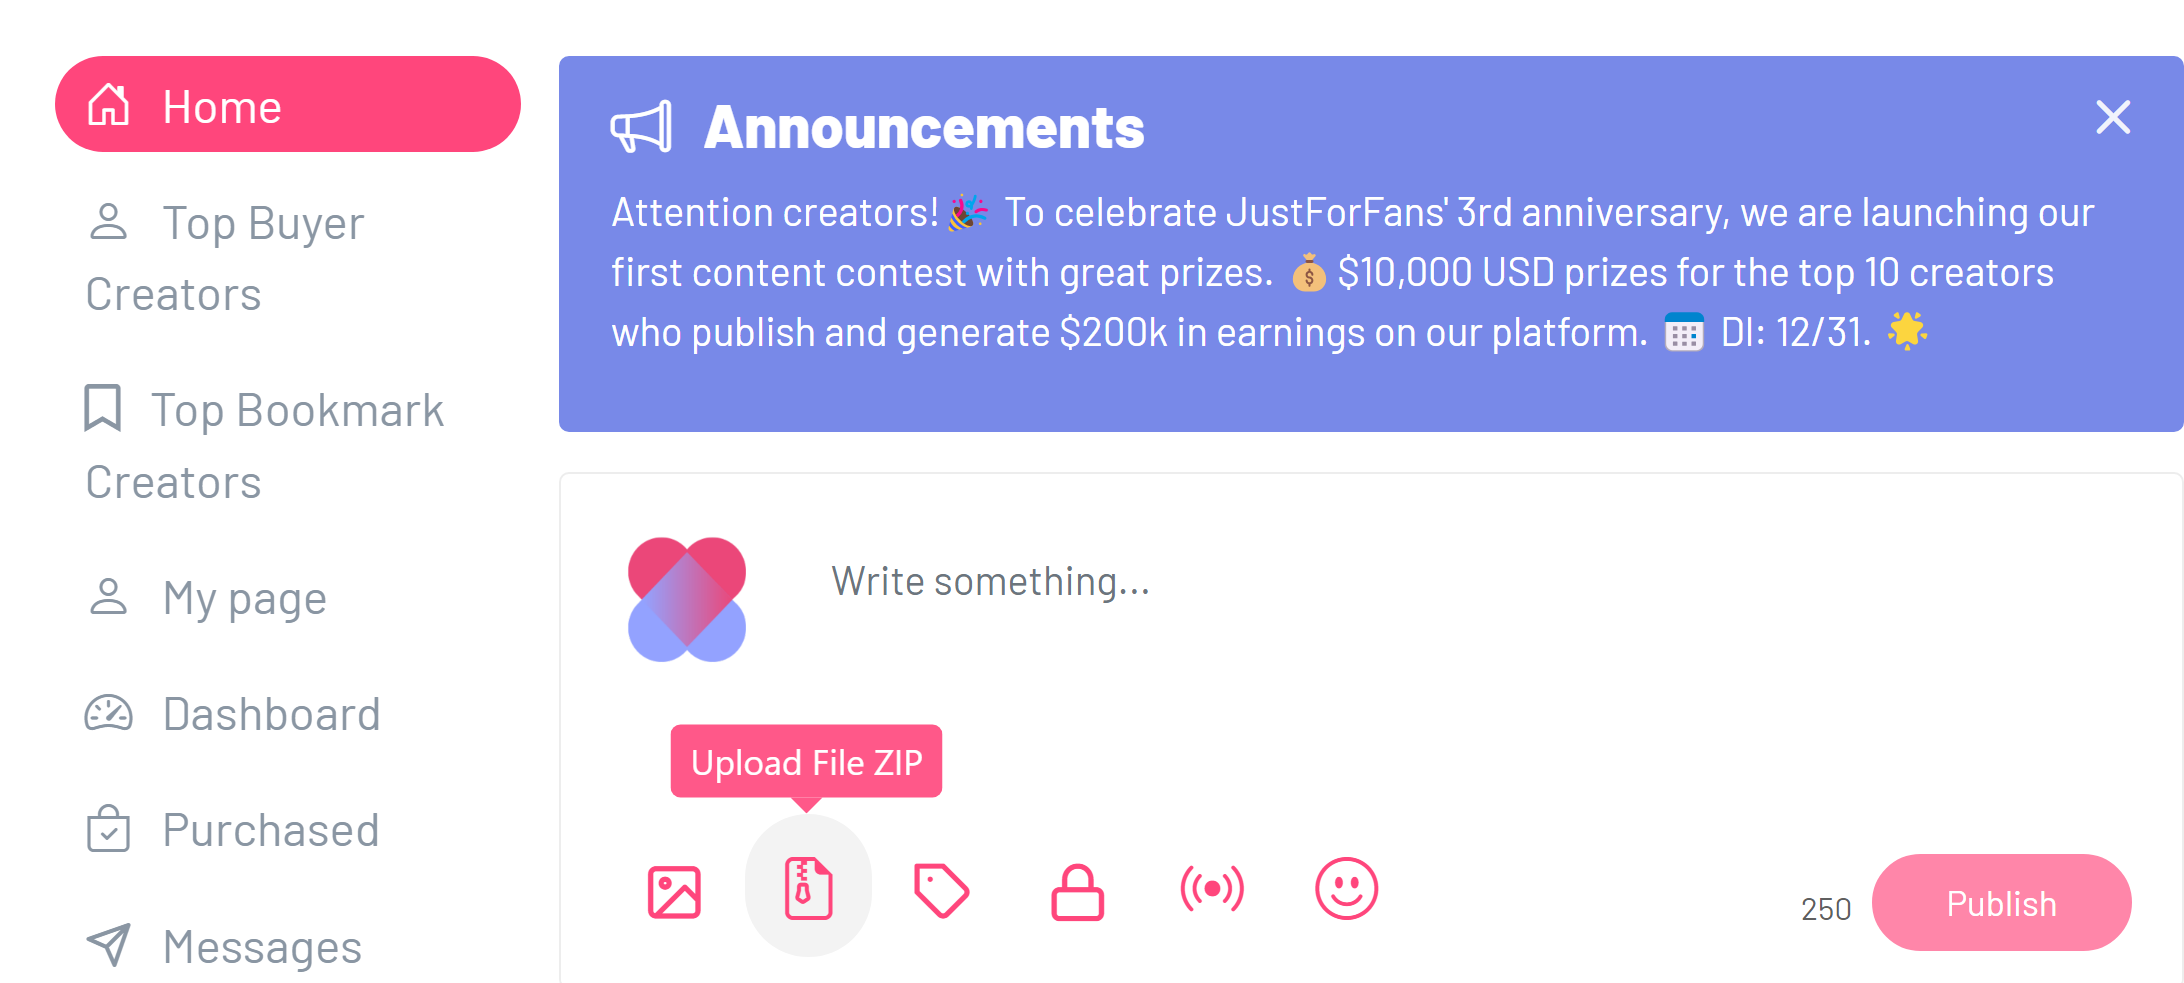
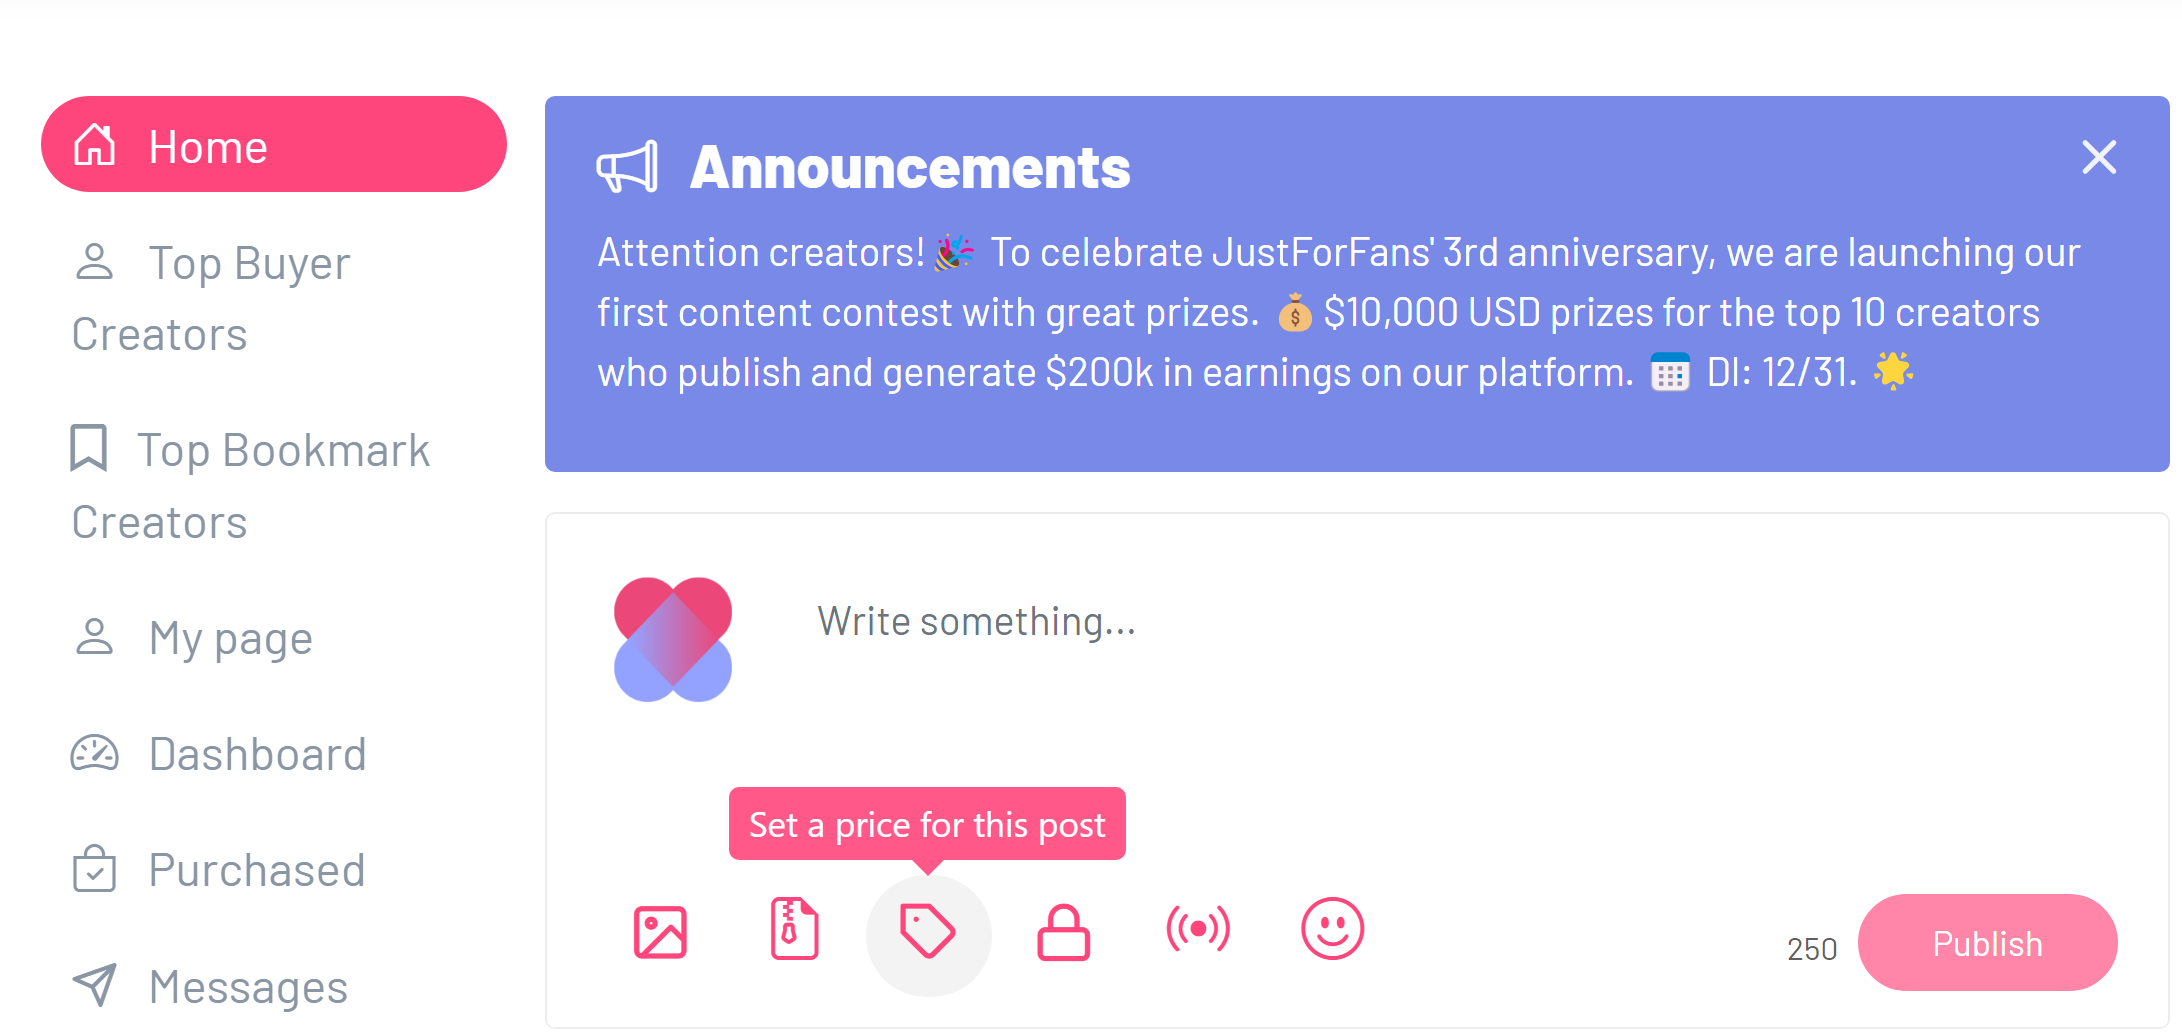
- Visit your personal page where you'll find the space to publish content.
- Look for the following buttons:
- Upload Photos, Images, or Videos: Click the first button to upload visual content.

- Upload Zip Files: The second button allows you to upload files in .zip format.

- Set a Price: Use the third button to apply a price to your post (optional).

- Privacy Settings: The fourth button, represented by a lock icon, determines whether your post is visible to your subscribers only.

Live streaming: The five button you can make a live stream show post.

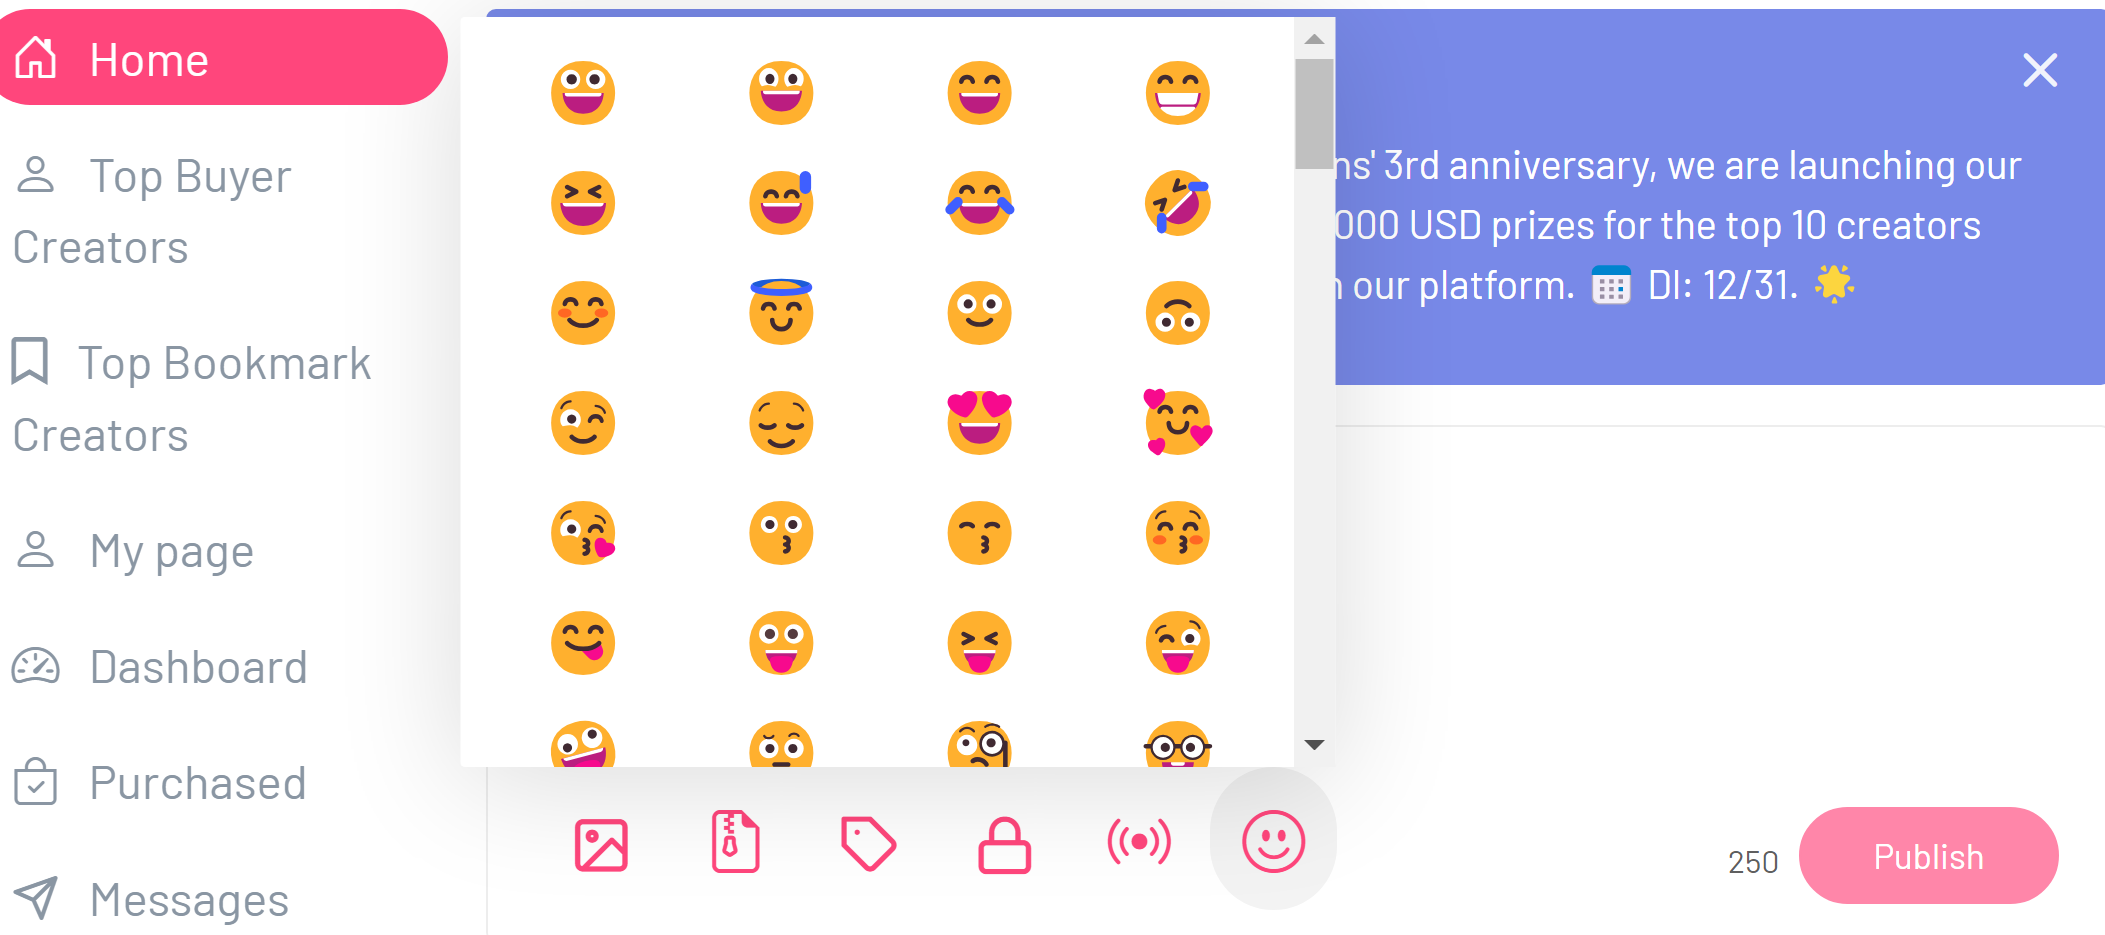
- Insert Emojis: The last button lets you add emojis to your post.

- Content Limitation:
- Each publication must not exceed 250 characters.
How to Cancel a Subscription
General Information
Subscriptions to the service are billed in advance on a recurring and periodic basis (daily, weekly, monthly, or annually), depending on the subscription plan you selected at the time of purchase. At the end of each period, your subscription will automatically renew under the same conditions unless you cancel it or the company cancels it.
Steps to Cancel Your Subscription
If your subscription was billed through CCBILL, follow these additional steps:
If you need further assistance or encounter any issues during the cancellation process, do not hesitate to contact our customer support team for help.
Subscriptions to the service are billed in advance on a recurring and periodic basis (daily, weekly, monthly, or annually), depending on the subscription plan you selected at the time of purchase. At the end of each period, your subscription will automatically renew under the same conditions unless you cancel it or the company cancels it.
Steps to Cancel Your Subscription
- Access Your Account Settings:
- Log in to your account on our website.
- Go to the account settings page.
- Find the Subscription Option:
- Look for the subscriptions section within your account settings.
- Cancel the Renewal:
- Within the subscriptions section, you will find the option to cancel the automatic renewal of your subscription.
- Select the option to cancel the renewal and follow the provided instructions.
- Confirmation of Cancellation:
- Once you have canceled the renewal, you will receive a confirmation of your subscription cancellation.
- No Refunds: You will not receive a refund for the fees already paid for your current subscription period. You will be able to access the service until the end of your current subscription period.
If your subscription was billed through CCBILL, follow these additional steps:
- Contact CCBILL Customer Service:
- Visit the following link to contact CCBILL customer service: CCBill Customer Service
- Follow the instructions provided on the CCBILL support page to cancel the renewal of your subscription.
If you need further assistance or encounter any issues during the cancellation process, do not hesitate to contact our customer support team for help.
How to Gift a Subscription to One of Your Fans
Are you looking to surprise one of your fans with a gift subscription? It’s a fantastic way to show appreciation and keep your followers engaged. Here’s a simple guide on how to gift a subscription through our platform.
Step-by-Step Guide to Gifting a Subscription
Step 1: Navigate to Your Profile Settings To start, you’ll need to log in to your account. Once you’re logged in, head over to the menu and select "Edit Your Profile." This is where you can manage various aspects of your account settings.
Step 2: Access the Gift User Feature In your profile settings, look for the option labeled "Gift User." This feature is specifically designed to let you provide subscriptions to your fans as gifts.
Step 3: Enter the Username Once you click on "Gift User," you’ll be prompted to enter the username of the fan you wish to gift the subscription to. Make sure you enter the correct username to ensure that the right person receives your gift.
Step 4: Submit Your Gift After you have entered the username, simply click the "Submit" button. This action will finalize the process, and the selected user will be notified of their new subscription gift.
Things to Remember
This feature is part of our ongoing efforts to provide you with flexible and user-friendly options to manage your interactions on our platform. We hope you and your fans enjoy this new addition. Happy gifting!
Step-by-Step Guide to Gifting a Subscription
Step 1: Navigate to Your Profile Settings To start, you’ll need to log in to your account. Once you’re logged in, head over to the menu and select "Edit Your Profile." This is where you can manage various aspects of your account settings.
Step 2: Access the Gift User Feature In your profile settings, look for the option labeled "Gift User." This feature is specifically designed to let you provide subscriptions to your fans as gifts.
Step 3: Enter the Username Once you click on "Gift User," you’ll be prompted to enter the username of the fan you wish to gift the subscription to. Make sure you enter the correct username to ensure that the right person receives your gift.
Step 4: Submit Your Gift After you have entered the username, simply click the "Submit" button. This action will finalize the process, and the selected user will be notified of their new subscription gift.
Things to Remember
- Ensure that the username entered is correct to avoid any mishaps.
- The gifted subscription will start immediately upon your submission unless specified otherwise.
This feature is part of our ongoing efforts to provide you with flexible and user-friendly options to manage your interactions on our platform. We hope you and your fans enjoy this new addition. Happy gifting!
How to Cancel Your Account: A Step-by-Step Guide
Deciding to cancel your account can be a big decision, but once you've made up your mind, the process should be straightforward and hassle-free. Whether you're taking a break or choosing to permanently close your account, following these clear steps will help you accomplish it smoothly.
Steps to Cancel Your Account
Step 1: Log In to Your Account Start by visiting our website and logging in with your username and password. It’s essential that you have access to your account as you will need to navigate through the settings to initiate the cancellation process.
Step 2: Enter the Platform Once logged in, you will land on the main dashboard of the platform. This area provides a snapshot of your account, but to proceed with cancellation, you’ll need to access additional settings.
Step 3: Navigate to Account Settings To find the account settings, look to the upper right-hand corner of the page. Here, you will see an option to "Edit My Page." Click on this link. This area is crucial as it contains various settings related to your account's functionality and personal settings.
Step 4: Locate the Cancellation Option After entering the "Edit My Page" section, scroll down to the bottom of the page. Here, you will find the "Delete Account" option. This section might require you to scroll past other settings and information, so keep an eye out for the specific wording.
Step 5: Confirm Account Deletion Upon clicking "Delete Account," you may be prompted to confirm your choice. This step is vital as it prevents accidental deletions. You might be asked to enter your password again or to provide a reason for your departure, depending on the platform's requirements.
Things to Consider Before Cancelling
- Subscription Cancellations: If you have any active subscriptions or services linked to your account, make sure to cancel these to avoid future charges.
- Finalize Transactions: If there are any pending transactions or activities, try to finalize them before cancellation to avoid complications.
Bank Transfer Requirements in Latin America: A Comprehensive Guide
When sending money across borders, especially in Latin America, understanding the specific banking requirements in each country is crucial to ensure that your transactions go smoothly. Each country has its own banking infrastructure, and the information required can vary slightly depending on whether you’re making a local or international transfer. In this article, we’ll break down the essential banking information you’ll need for transfers in various Latin American countries.
General Information Required for Bank Transfers:
Before diving into country-specific details, here is a general list of information you will often need for a bank transfer in Latin America:
In addition to the above information, Just For Fans requires the following data to issue an invoice for payments made:
Country-Specific Requirements for Bank Transfers in Latin America:
1. Central America
Belize:
Argentina:
Mexico:
For international transfers, additional information might be required depending on the country and the bank's regulations. Here's what you should keep in mind:
Transferring money in Latin America is generally straightforward if you have the right information. While each country might have slight variations in the requirements, having the beneficiary's name, account number, bank name, and SWIFT code at hand will usually be sufficient. Additionally, for Just For Fans, it’s essential to have the user's full name, address, and email to ensure that a proper invoice is issued for each completed payment.
Make sure to stay informed of the local laws and international guidelines to avoid any issues or delays in your transfers.
General Information Required for Bank Transfers:
Before diving into country-specific details, here is a general list of information you will often need for a bank transfer in Latin America:
- Full Name of the Beneficiary: The recipient’s name as registered on their bank account.
- Bank Account Number: Each country uses its own system, such as a simple account number or a unique identifier like CLABE or CBU.
- Bank Name: The financial institution where the recipient holds the account.
- SWIFT/BIC Code: Essential for international transfers, this code helps identify the bank in the global banking system.
- Bank Branch Code or Local Bank Identifier: In some countries, you may need to specify the exact branch of the bank.
- Purpose of the Transfer: In some countries, you may need to indicate the reason for the transfer for regulatory reasons.
In addition to the above information, Just For Fans requires the following data to issue an invoice for payments made:
- Full Name and Last Name of the user.
- Address of the beneficiary.
- Email Address of the user.
Country-Specific Requirements for Bank Transfers in Latin America:
1. Central America
Belize:
- Full Name of the Beneficiary
- Bank Account Number
- Bank Name
- SWIFT/BIC Code (for international transfers)
- Full Name of the Beneficiary
- Bank Account Number or IBAN (Costa Rica uses IBAN)
- Bank Name
- SWIFT/BIC Code (for international transfers)
- Full Name of the Beneficiary
- Bank Account Number
- Bank Name
- SWIFT/BIC Code (for international transfers)
- Full Name of the Beneficiary
- Bank Account Number
- Bank Name
- SWIFT/BIC Code
- Full Name of the Beneficiary
- Bank Account Number
- Bank Name
- SWIFT/BIC Code
- Full Name of the Beneficiary
- Bank Account Number
- Bank Name
- SWIFT/BIC Code
- Full Name of the Beneficiary
- Bank Account Number
- Bank Name
- SWIFT/BIC Code
Argentina:
- Full Name of the Beneficiary
- Bank Account Number or CBU (Clave Bancaria Uniforme)
- Bank Name
- SWIFT/BIC Code (for international transfers)
- Full Name of the Beneficiary
- Bank Account Number
- Bank Name
- SWIFT/BIC Code
- Full Name of the Beneficiary
- Bank Account Number
- CPF or CNPJ (Tax ID Number)
- Bank Name
- SWIFT/BIC Code
- Full Name of the Beneficiary
- Bank Account Number
- Bank Name
- RUT (Tax ID Number)
- SWIFT/BIC Code
- Full Name of the Beneficiary
- Bank Account Number
- Bank Name
- SWIFT/BIC Code
- Full Name of the Beneficiary
- Bank Account Number
- Bank Name
- SWIFT/BIC Code
- Full Name of the Beneficiary
- Bank Account Number
- Bank Name
- SWIFT/BIC Code
- Full Name of the Beneficiary
- Bank Account Number or IBAN
- Bank Name
- SWIFT/BIC Code (since it is a French territory, the European banking system applies)
- Full Name of the Beneficiary
- Bank Account Number
- Bank Name
- SWIFT/BIC Code
- Full Name of the Beneficiary
- Bank Account Number
- Bank Name
- SWIFT/BIC Code
- Full Name of the Beneficiary
- Bank Account Number
- Bank Name
- SWIFT/BIC Code
- Full Name of the Beneficiary
- Bank Account Number
- Bank Name
- SWIFT/BIC Code
- Full Name of the Beneficiary
- Bank Account Number
- Bank Name
- SWIFT/BIC Code
Mexico:
- Full Name of the Beneficiary
- Bank Account Number or CLABE (Clave Bancaria Estandarizada, 18 digits)
- Bank Name
- SWIFT/BIC Code (for international transfers)
For international transfers, additional information might be required depending on the country and the bank's regulations. Here's what you should keep in mind:
- SWIFT/BIC Code – This is critical for international transfers to identify the recipient's bank on the global network.
- IBAN (International Bank Account Number) – Some countries, like Costa Rica and French Guiana, use the IBAN system for international transfers.
- Purpose of Transfer – In certain countries, regulatory authorities require you to specify the reason for the transfer, especially for large sums.
- Tax ID Numbers – Countries like Brazil and Argentina often require the CPF or CBU of the beneficiary for compliance with tax and anti-money laundering regulations.
Transferring money in Latin America is generally straightforward if you have the right information. While each country might have slight variations in the requirements, having the beneficiary's name, account number, bank name, and SWIFT code at hand will usually be sufficient. Additionally, for Just For Fans, it’s essential to have the user's full name, address, and email to ensure that a proper invoice is issued for each completed payment.
Make sure to stay informed of the local laws and international guidelines to avoid any issues or delays in your transfers.
How to Use the Dashboard to View Your Account's Statistics and Earnings
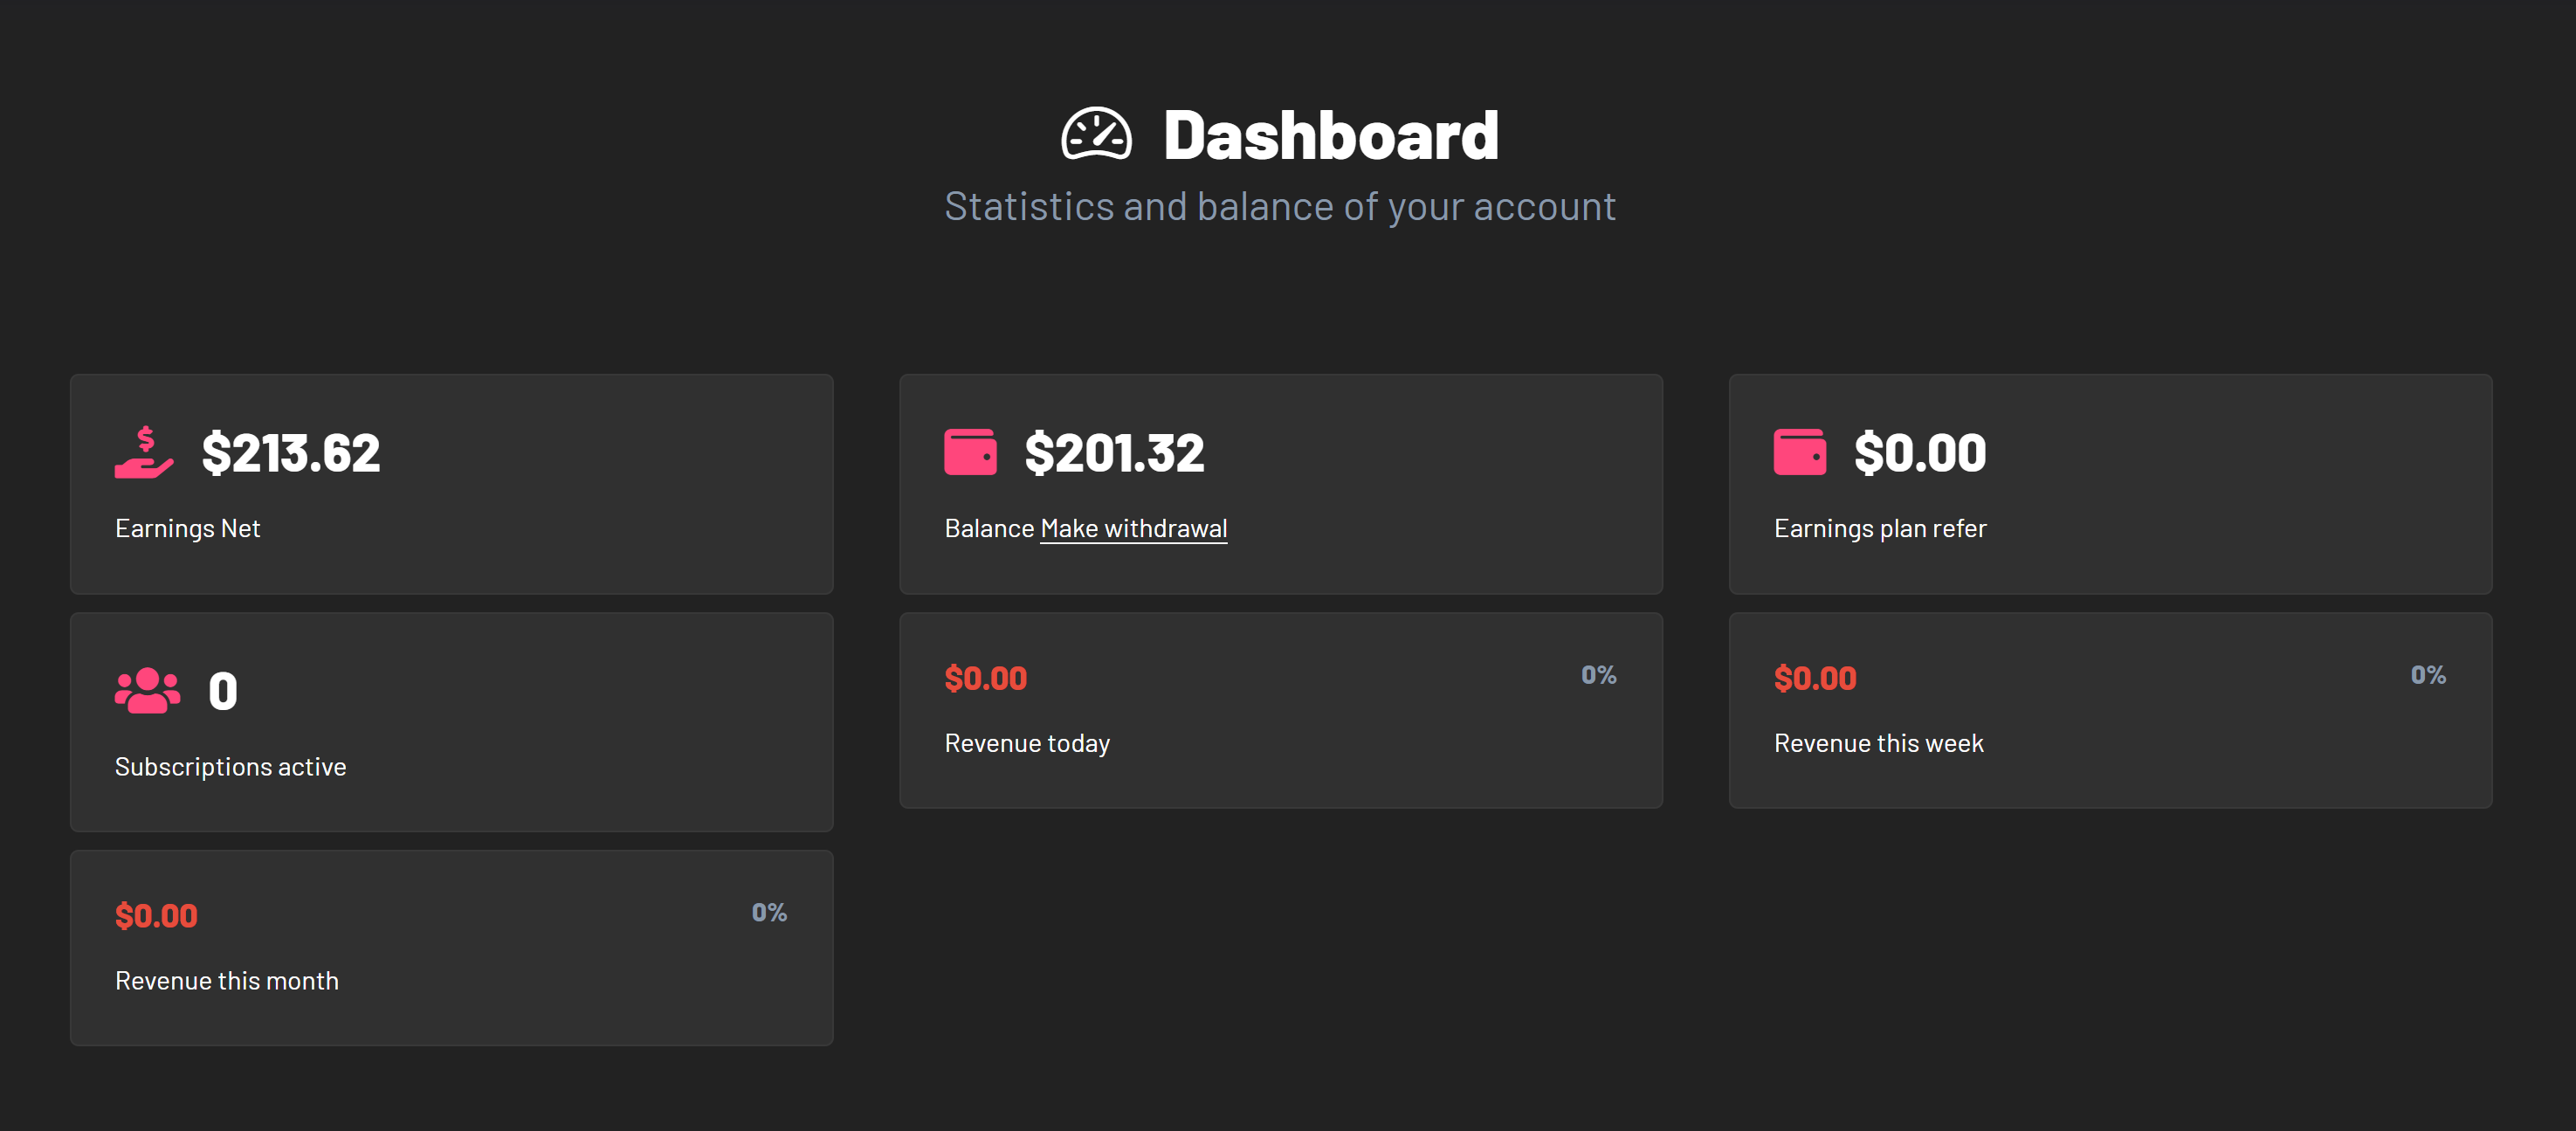
The Dashboard is the heart of your account, providing an overview of your performance, earnings, and activity. It consolidates all critical statistics in one place, making it easy to monitor your progress and manage your finances. This guide will help you understand and navigate the Dashboard to make the most out of your platform experience.
What’s on the Dashboard?
The Dashboard is divided into several sections, each designed to present key data clearly and concisely. The main areas include:
- Earnings Net
This section shows your total net earnings to date. It’s a quick way to see how much you’ve earned overall. - Balance
Displays your current balance available for withdrawal. You’ll also find a link here to initiate the withdrawal process by clicking "Make withdrawal". - Earnings Plan Refer
If you’re participating in a referral program or other earnings plans, this area tracks the total amount earned through referrals. - Subscriptions Active
Shows the number of active subscriptions tied to your account. - Revenue Insights
- Revenue Today: Tracks your earnings for the current day.
- Revenue This Week: Displays weekly revenue totals.
- Revenue This Month: Summarizes earnings for the month.
Step-by-Step: How to Use the Dashboard
- Log in to Your Account
Enter your credentials and access your account. - Navigate to the Dashboard
On the main navigation menu, click or tap on Dashboard. This will take you to the main statistics page. - Review Key Statistics
Once on the Dashboard, take a moment to scan the highlighted areas:- Check your Earnings Net to understand your total income.
- Look at the Balance section to see what’s ready for withdrawal.
- Monitor active subscriptions and revenue breakdowns for daily, weekly, and monthly performance.
- Initiate a Withdrawal
If you’re ready to transfer funds, click "Make withdrawal" under the Balance section. Follow the on-screen instructions to complete the process. - Track Progress Over Time
Use the revenue sections to identify trends in your earnings. Keep an eye on the percentages to understand how your performance evolves day-to-day and week-to-week.
Tips for Using the Dashboard Effectively
- Visit Regularly
Make it a habit to check your Dashboard frequently to stay updated on your performance and revenue changes. - Analyze Trends
Pay attention to the revenue percentages. Negative percentages might indicate a drop in activity, prompting you to adjust your strategies. - Use the Withdrawal Feature
Keep an eye on your balance and withdraw funds regularly to maintain smooth financial operations. - Ask for Support if Needed
If you notice discrepancies or have questions about the statistics, reach out to the platform's support team for assistance.
Why the Dashboard Matters
The Dashboard is more than just a statistics page; it’s a tool for tracking your success and planning future strategies. By leveraging the insights provided here, you can optimize your activities on the platform and ensure consistent growth in your earnings and engagement.
How to Register AI Influencers on Just For Fans: A Step-by-Step Guide
How to Register AI Influencers on Just For Fans: A Step-by-Step Guide
AI influencers are transforming the content creation industry, offering unique opportunities for engagement and creativity. If you’re a developer or manager of AI influencers and wish to monetize their content on Just For Fans, this guide will walk you through the registration process while ensuring compliance with the platform's rules. Let’s get started!
Step 1: Understand Just For Fans’ Rules and Guidelines
Before registering your AI influencers, it’s crucial to familiarize yourself with Just For Fans’ community guidelines. While the platform welcomes innovation, transparency is key. AI influencers must be clearly identified as such to avoid misleading fans. Including hashtags like #AIInfluencer or #VirtualCreator in all posts and bios is a recommended practice.
Additionally, all content must comply with the platform’s general standards, including ethical content creation, copyright rules, and privacy protections.
Step 2: Create a New Account for Each AI Influencer
Each AI influencer should have their own dedicated account on the platform. Follow these steps to register:
Step 3: KYC Verification for AI Influencers
Just For Fans requires all creators to complete a Know Your Customer (KYC) verification process to ensure platform security. Since AI influencers lack personal identification, you’ll need to submit the details of a representative from your team who manages the account.
Step 4: Maintain Transparency and Ethical Engagement
Once registered, transparency should be a core principle of your AI influencer’s content strategy. Clearly communicate their AI nature in every interaction, using hashtags like #AI or #VirtualInfluencer in posts and videos. Fans appreciate honesty, and this approach builds trust and loyalty.
Step 5: Leverage Platform Features to Monetize
After completing registration, explore Just For Fans’ tools for monetization:
Conclusion
Registering AI influencers on Just For Fans is a straightforward process when you prioritize transparency, ethical practices, and compliance with platform rules. By following the steps outlined here, your AI influencers can successfully join the platform and engage with fans in exciting, innovative ways.
For any questions or support during the registration process, don’t hesitate to reach out to Just For Fans Support. We’re here to help you succeed!
AI influencers are transforming the content creation industry, offering unique opportunities for engagement and creativity. If you’re a developer or manager of AI influencers and wish to monetize their content on Just For Fans, this guide will walk you through the registration process while ensuring compliance with the platform's rules. Let’s get started!
Step 1: Understand Just For Fans’ Rules and Guidelines
Before registering your AI influencers, it’s crucial to familiarize yourself with Just For Fans’ community guidelines. While the platform welcomes innovation, transparency is key. AI influencers must be clearly identified as such to avoid misleading fans. Including hashtags like #AIInfluencer or #VirtualCreator in all posts and bios is a recommended practice.
Additionally, all content must comply with the platform’s general standards, including ethical content creation, copyright rules, and privacy protections.
Step 2: Create a New Account for Each AI Influencer
Each AI influencer should have their own dedicated account on the platform. Follow these steps to register:
- Go to the Registration Page
Visit JustForFans.app and click on the “Sign Up” button. - Complete Basic Profile Information
Fill out the required fields, such as username, email, and account type. For transparency, mention in the bio that the account is for an AI influencer. Example:
“This is a virtual influencer created by AI. Managed by [Your Team/Company Name].” - Upload a Profile Picture and Cover Image
Use high-quality visuals that represent your AI influencer’s branding. These visuals must not impersonate real individuals without proper permissions.
Step 3: KYC Verification for AI Influencers
Just For Fans requires all creators to complete a Know Your Customer (KYC) verification process to ensure platform security. Since AI influencers lack personal identification, you’ll need to submit the details of a representative from your team who manages the account.
- Submit Team Representative’s ID
Provide a valid government-issued ID of the individual or entity managing the AI influencer. This representative will be held accountable for the account’s activities. - Declaration Letter
Include a signed document stating:- The account represents an AI influencer.
- The account is fully managed by your team or company.
- You commit to total transparency with fans regarding the influencer’s nature.
- Upload Required Documents
Submit these documents through the KYC portal. For assistance, you can contact Just For Fans Support at justforfansapp@gmail.com
Step 4: Maintain Transparency and Ethical Engagement
Once registered, transparency should be a core principle of your AI influencer’s content strategy. Clearly communicate their AI nature in every interaction, using hashtags like #AI or #VirtualInfluencer in posts and videos. Fans appreciate honesty, and this approach builds trust and loyalty.
Step 5: Leverage Platform Features to Monetize
After completing registration, explore Just For Fans’ tools for monetization:
- Subscription Plans: Set custom subscription tiers for your AI influencer.
- Exclusive Content: Offer premium content for paying subscribers.
- Referral Program: Earn passive income by referring other creators.
Conclusion
Registering AI influencers on Just For Fans is a straightforward process when you prioritize transparency, ethical practices, and compliance with platform rules. By following the steps outlined here, your AI influencers can successfully join the platform and engage with fans in exciting, innovative ways.
For any questions or support during the registration process, don’t hesitate to reach out to Just For Fans Support. We’re here to help you succeed!
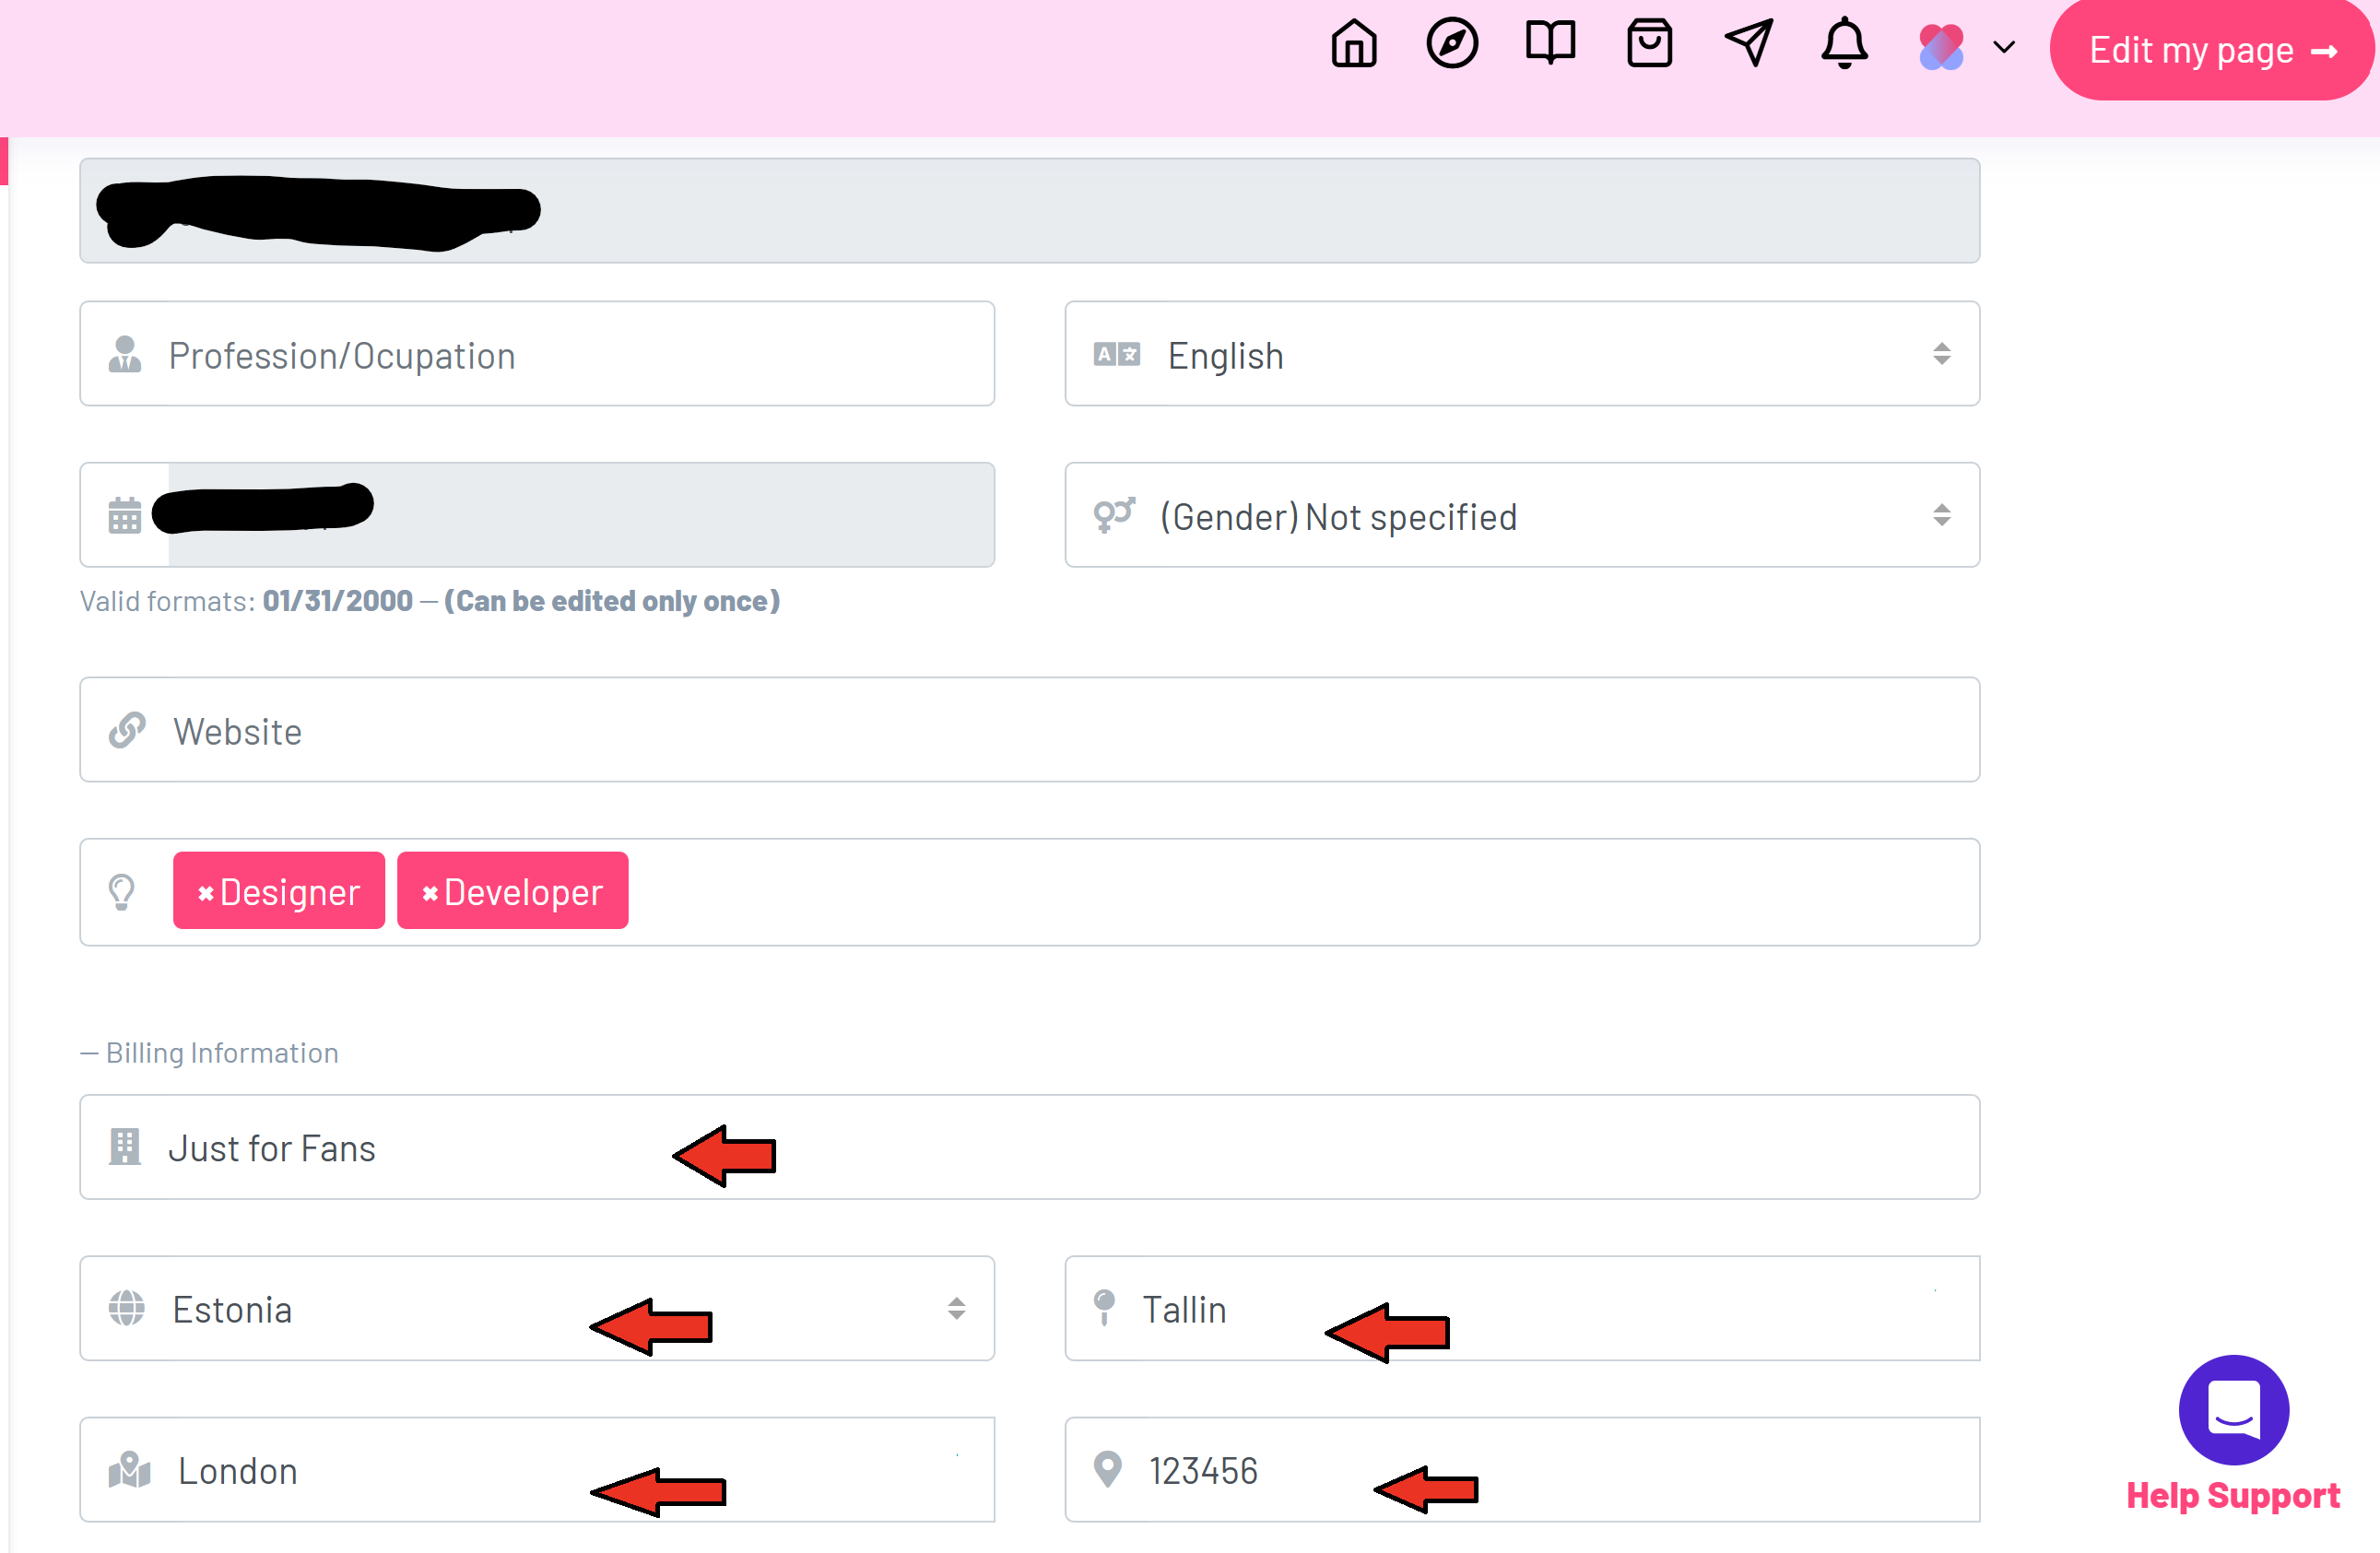
How to Request a Payout on JustForFans.app
To withdraw your earnings, you must complete your billing details as shown in the example. Incomplete or incorrect information may cause delays. Please ensure all details are accurate before submitting a payout request. You can update your billing information in the Billing Section of your account settings.
